

Well... one my favorite blogs is giving away stuff! I'd like to win it, but of course I'm not greedy.... So any readers/lurkers/whatevers head on over to Lucky in Love for a chance for some awesome postcards (So many uses for these!)
Thursday, April 15, 2010
Saturday, March 20, 2010
DIY Doily Disaster
I've been wanting to do some sort of craft lately, so I figured I would do a trial of the canvas totes that I wanted to make for part of my bridesmaids gifts.
I have seen this project on SO many blogs lately, but I believe that this is the one where I first came across it.
I thought it seemed cute. I liked that I could still personalize it, and it seemed easy. So today I had the fiance drop me off at Michael's (I didn't make him go in as he has apparently reached his limit on the number of times he can suffer through a Michael's shopping trip with me) and I went in search of the items I needed. I already have lots of paintbrushes at home, so I bought one plain canvas tote, a bottle of brown fabric pain, some 10 inch doilies, and a can of spray adhesive. Thanks to a 40% Off One Item coupon, this cost me about $12.
So, I came home and attempted it. I had read on some blogs that people had had some problems getting the paint to look exactly right. It seems it often creeps under parts of the doily and then you don't get that tidy look that I was going for. Still... I figured I'd give it a shot.
Well.............. It didn't work out. The bag looked like a sad little doily disaster. I thought I did it all right too. I adhered my doily. I made sure it was firmly in place, but yet my paint still got into places I didn't want it to. I read on another blog (can't remember which one right now) about how she found out that if you use an Exacto knife and cut out a freezer paper stencil from the doily and then adhere that freezer paper stencil to your bag it comes out much more precise, but I'm lazy and dont feel like cutting out all those little tiny holes so the doily idea may have to just go into my "DIY Fail" file.
So, here I sat with a messy looking $4 canvas bag. I couldn't let that go to waste. I tried to figure out something else to do with it that would cover up the doily mistake and yet still look cute. I couldn't think of many easy things. I didn't feel like searching for a new project or stencil... so I decided to just wing it.
Here's what I came up with:

Yes, what started out as a bag for the bridesmaids ended up as a bag for me. Lol. Oh well... I had to figure something out to do with it. So I painted it with the brown fabric paint that I bought today and then used some left over acrylic paint I had around the house (after I googled to see if acrylic paint would be ok for fabric, and the general consensus seemed to be that it is... we'll see). I just freehanded the color blocks, then decided to try to freehand the "W". I drew the "W" on the bag first with a pencil and then painted over it.
It came out pretty good. I'm kinda proud of it for a project that wasn't planned and for not letting the "Doily Disaster" get me down.
I found some cheaper canvas bags online today from here. Even after shipping they still end up under $2 per bag.
I hope to still make some sort of bags for the bridesmaids.... just have to rethink my design (and figure out what to do with all my leftover doilies).
Thursday, March 4, 2010
The Reception Site
We booked our reception site about a month ago. It's the Fairfield Banquet & Convention Center here in Cincinnati, OH. I'm actually very happy with it. It was the best price for all the things included. We are having our reception in the "Diamond Room" which is the smallest of the 3 banquet rooms they have, but is plenty big enough for us since we are hoping to keep our guest list around 100-125 people.
When I first went to visit and saw the room with one of my bridesmaids, Anna, I loved the room but hated the way it was painted and some of the decorations. It just looked a little dated. The walls were a pale peach color and the accents were a light green color. However, I was willing to deal with that for the price, all the things included, and the general facility was really quite nice. Weeks later I took my fiance back to see the place just to make sure he was ok with it too before I paid the deposit.... and SURPRISE! They had repainted everything. The room is all crisp and white. This was the best thing I could have hoped for. So, now I am quite excited. Here's a picture from their website of our room.

Thursday, February 11, 2010
Gotta love free stuff!
Over at the Bridal Gown Blog... there is a give away for a mongram inspired package of goodies! I especially love the cookie cutters.
The Backyard Bride... is giving away an Ulta giftcard so you can stock up on some make-up/hair supplies.
And over at Lucky in Love... there is a give away for a $25 gift card for myweddingfavors.com. So many cute and inexpensive things there that I would love to spend that $25 on!
Good Luck!
Wedding Colors
Our wedding is in the fall (11-11-11) and I've been having a hard time deciding what colors I would like to do. I have it narrowed down to a few, but just can't decide!
Option 1: Hot pink/fuschia and chocolate brown- Because pink is my FAVORITE color and I would love to be able to incorporate it somehow. Though, I'm not sure if this really goes into my fall rustic/picnic type of theme, especially since I was intending to use candy corn for my favors. Here is the only inspiration board that is kind of what I'd do for a fuschia and brown wedding.

Option 2: Orange and brown. I love this idea because I totally love anything pumpkin related. Seriously... I heart pumpkins. This would go well with my theme and outdoorsy/pumpkin decorations. My main issue with this one is that I haven't seen a lot of orange bridesmaids dresses that seem to be the right color. A lot of them look like neon orange and I'm just not sure that's the color I want to go for... and I don't know if that'd look good on all the bridesmaids. I had contemplated putting the bridesmaids in brown dresses with an orange sash or something. But that also presents a possible problem since my groom and groomsmen are wearing brown tuxedos. If they are all wearing brown, then I feel like the browns need to match, which could be difficult to do. Here is a picture of a pumpkin inspired wedding I love... and a partial picture of bridesmaids in brown dresses and a groom in a brown tux. (I've been saving pictures I found on the internet for a long time, so I'm not sure where I got most of these from... but if they belong to anyone who reads this, let me know and I'll give you credit. Sorry)


Option 3: Purple, orange, and brown- I like the way the really dark purple looks in pictures, but purple really isn't one of my favorite colors. I mean, I like it.... just wouldn't normally be my first choice and I'm also concerned about the wedding looking too "summery" when I'm going for the autumn look. But I like the idea of being able to put my girls in purple dresses and then give them orange flowers, like these pictures.


I'm completely indecisive.... you'll learn that if you keep reading. I apologize in advance.
Wednesday, February 3, 2010
Making my own Monogram
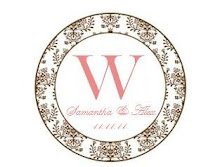
I love the look of the personalized monograms for weddings. So, I've been trying to create my own. It's still in the very early stages, especially since I don't really consider myself a computer genius. They have started out very simple, which I like. I just don't know if maybe I want to incorporate something else with them. Perhaps some sort of fall element? We'll see.
Here are the preliminary options:


Welcome to my new blog!
I decided since my other blog is mostly devoted to weight loss/healthy living stuff, that I'd create a separate one for just wedding stuff.
I am getting married 11-11-11 to my favorite man in the world!
We picked this date because:
1) It's a cool looking date.
2) Maybe since it'll be easier to remember, he won't forget our anniversary.
3) We are on a tight budget and need time to save up the money for this wedding.
4) I want to DIY as many of the wedding details as I possibly can.
So this will be my place for ideas, inspiration, projects, rants and raves.
Subscribe to:
Posts (Atom)
.jpg)


